
Extend the life of your anchor windlass with proper maintenance.
Story & photos by Capt. Frank Lanier
While boat owners expect their anchor windlasses to perform flawlessly under the harshest conditions, all bets are off unless the system receives regular maintenance to ensure proper operation. Here’s a look at how to keep your silent deckhand ready, willing and able.
Anchor windlasses come in a variety of styles, from vertical or horizontal (drum orientation) to those that are manual, electric or hydraulic powered. Each type of windlass comes with its own set of maintenance pros and cons. Manual units are pretty much bullet-proof, but require conscientious greasing and cleaning. Hydraulic units can develop fluid leaks, while electrical units have numerous corrosion-prone components (batteries, switches, solenoids, etc.) located in exposed, often wet locations.
While you’ll always want to follow the maintenance guidelines provided by the manufacturer of your particular windlass, here are some good basic tips that can help extend the life of most windlasses.
After each use:
- Rinse the windlass thoroughly with freshwater after each outing to wash off salt, sand and mud. Rinsing the rode (particularly the chain) before it enters the anchor locker is also a good idea. This is especially true if winch components are located within the locker and can be spattered with muck and debris.
- For hydraulic units, inspect hydraulic hoses, valves and connections for leaks or signs of damage.
Monthly or every 4 – 6 uses:
- Check the gear case lube oil level. Most worm gear-driven windlasses will have a sight glass for this. Milky oil indicates the presence of water (typically from a failed seal) and should be corrected immediately.
- Apply 5 to 10 pumps of marine grease to any Zerk fitting (grease nipples).
- Check all windlass mounting hardware for looseness, corrosion or leaks. Leaks are often caused by a broken bedding seal — a common result of the windlass being overstressed, which results in movement.
- Inspect all electrical connections (power connections, hydraulic solenoids and any related electric controls) for problems such as corrosion, arcing or charring. Disassemble and clean corroded connections (after turning off all power) with a wire brush and electrical cleaner; vinegar works well in a pinch. Battery terminal and post connections should be clean and tight. Coating battery posts with dielectric grease and installing insulating rubber boots will protect them from corrosion and accidental shorting.
- For units with the motor and gearbox located belowdeck, check the casing for corrosion. Many are constructed of painted steel and will readily corrode in the damp environment of the anchor locker should the finish be damaged. Address corrosion immediately (clean, prime and repaint or treat with an anti-corrosive spray as applicable) to prevent the situation from worsening.
- Inspect foredeck footswitches for damage and proper operation. Ensure the hinged covers are in place (to prevent accidental operation) and that the covers themselves operate easily and provide a good seal when closed. Check the rubber diaphragms for cracks, tears or deterioration. Applying a UV shield regularly (such as 303 Aerospace Protectant) will noticeably extend diaphragms’ service life.
Annual service:
- Disassemble the warping drum and wildcat (as applicable) and cone clutches; clean and apply fresh waterproof grease.
- Check hydraulic fluid levels and quality; change according to manufacturer specifications.
- Inspect the condition of the base seal (may be gasket or caulking) to ensure it’s watertight.
- Inspect the wildcat for wear and ensure the chain fits snugly without slipping. For all chain rodes, this should be done in conjunction with your annual inspection of the rode. Remove the rode and lay it out for complete inspection to ensure there are no elongated or otherwise damaged chain links, which can cause binding or slipping.
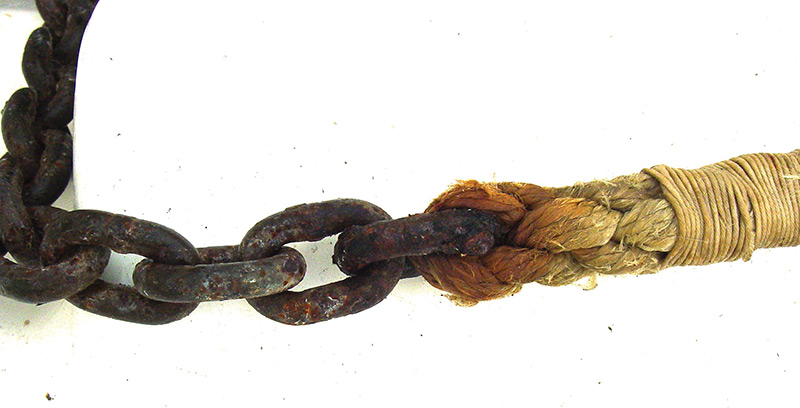
- For combination rodes (rope and chain), check the condition of the anchor rode splice/connection as well.
Top image: A corroded splice
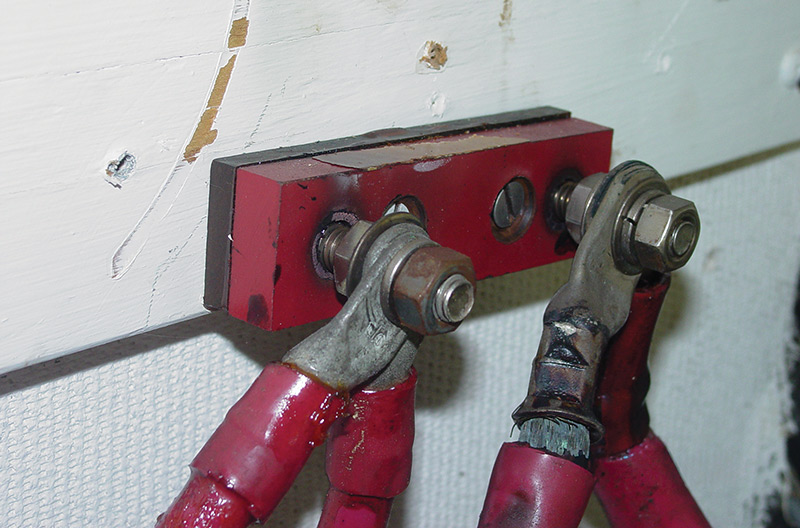
Charred terminal
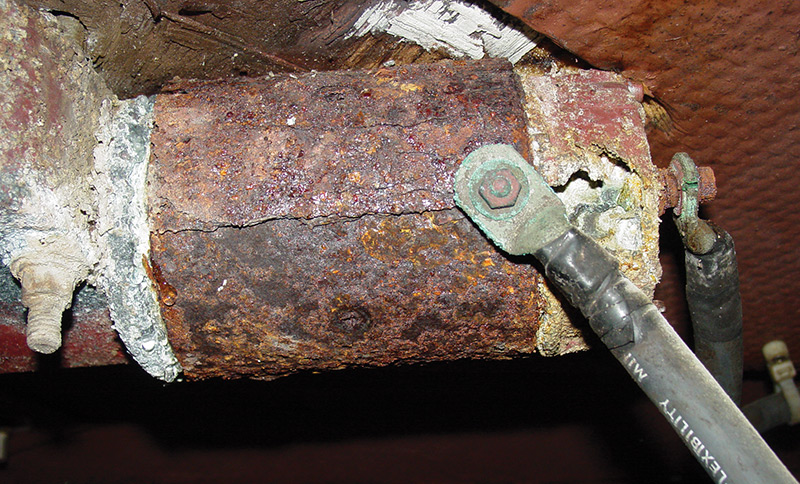
Corroded motor

CAPT. FRANK LANIER is an award-winner journalist, boat maintenance guru and owner of Capt. F.K. Lanier & Associates, Marine Surveyors and Consultants. Check out his YouTube channel “Everything Boats with Capt. Frank Lanier.” CAPTFKLANIER.COM